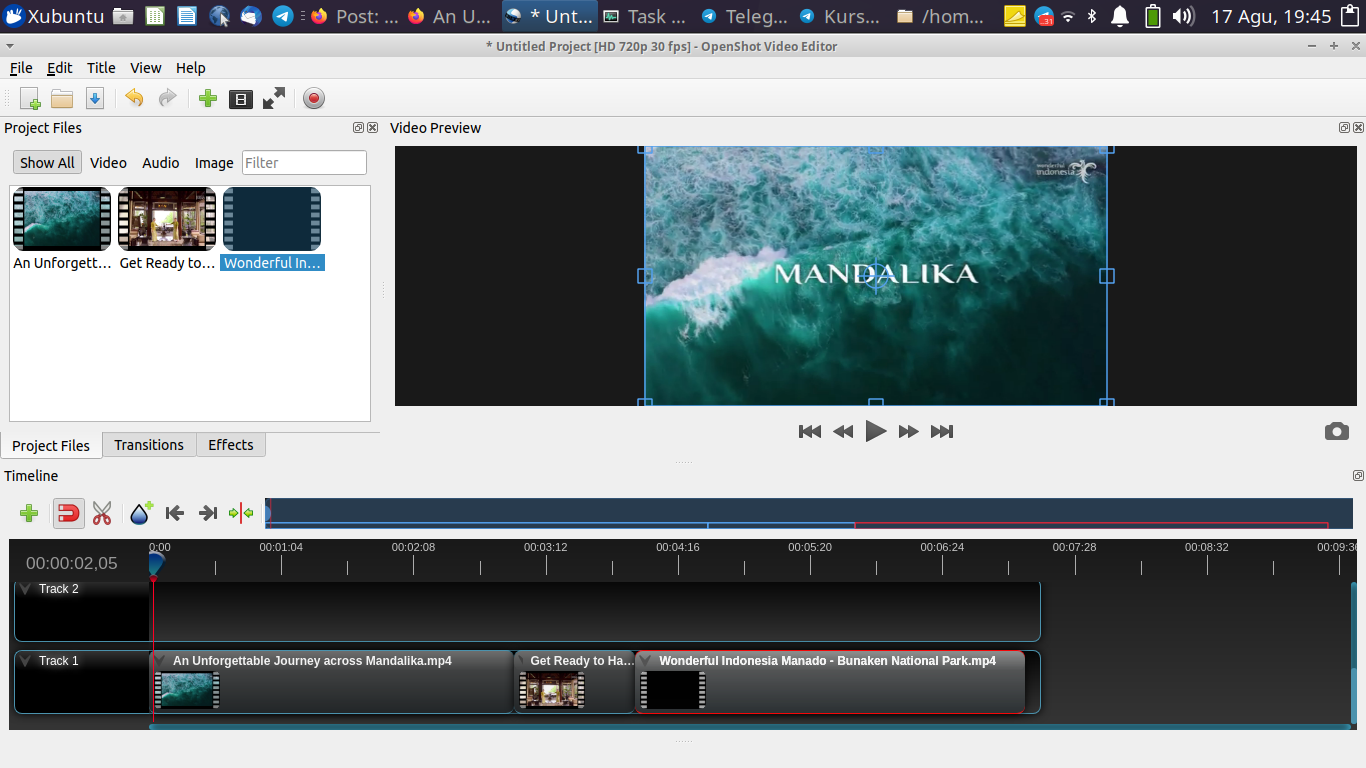
In this tutorial, we will learn the basics about how to edit video. This will involve joining and rendering with further explanations below. If you missed OpenShot Part 1, please read that first before practicing this tutorial. Here we go.
Subscribe to UbuntuBuzz Telegram Channel to get article updates.
Objectives
Like has been mentioned in Part 1, we will join three videos into one in mp4 format, and they are Mandalika, Bintan and Bunaken all from Wonderful Indonesia. If you didn't have them, download from YouTube using Invidious (follow this tutorial).
1. An Unforgettable Journey across Mandalika
2. Get Ready to Have a Joyful Time in Bintan!
3. Wonderful Indonesia | Manado - Bunaken National Park
1. Create a new project
Run OpenShot Video Editor.
Useful tip: you can close the Emojis section to the right by clicking its Close button ( X ). This will make your work space larger.
2. Import a video
First, click menu File > Import Files.
Then, navigate and select a video file and in this case Mandalika (mp4).
Third, video imported.
Alternatively, you can simply drag and drop video(s) from file manager to OpenShot window.
3. Put video to the track
First, drag video to Track 1 on the timeline.
Then, Ctrl+Scroll to zoom in / zoom out the timeline.
4. Add another and arrange them
First, repeat step 2 and 3.
Then, for the second video Bintan, put it on the track 1 after first video clip.
Then, for the third video Bunaken, put it on the track 1 after second video clip.
5. Evaluate video frames
Drag the head (blue slider with red line) on the timeline to right and left. What do you see? You will evaluate (watch) all video clips frame by frame from the first video to the last one displayed on the Video Preview. If you put each video at the correct place, total length (duration) of our project is 07:13 (seven minutes thirteen seconds) and you will find video frames as examples below:
6. Render
First, click the menu File > Export > Export Video.Then, adjust the options to the following:
- File name: final-video
- Folder path: /home/master
- Target: MP4
- Video profile: HD 720p 30 fps
- Quality: Low
Finally, click Export Video button at bottom.
Final result
A video with the name final-video.mp4 saved in the selected folder.
Next Exercise
To this point, you should be able to do very basic video editing with OpenShot. In the next tutorial, we will learn the opposite of this one, namely, to trim (cut) the video clips into shorter duration and render them again. See you next time!
This article is licensed under CC BY-SA 3.0.


