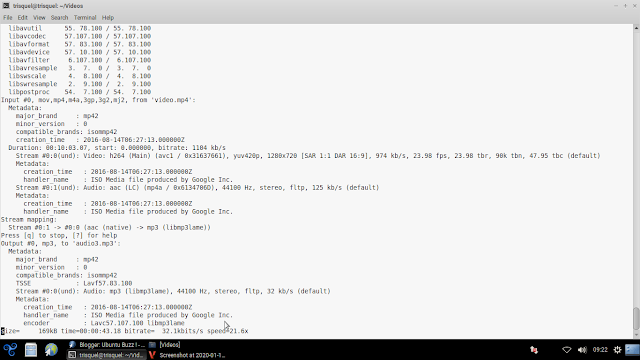
This tutorial covers a handy command line to convert MP4 video to MP3 audio. That command is called FFmpeg that is available in most GNU/Linux distros including Ubuntu and Trisquel. Although we know VLC can do conversion as well, but I figured out that FFmpeg does converting faster and better. By this, you can make an MP4 video playable as audio in your phone, portable player, and other devices other than computer. To do it, you should be able to do at least basic command lines as you can learn by the beginner's guide. I write this tutorial so I can refer to next time I write about multimedia. Enjoy!
Subscribe to UbuntuBuzz Telegram Channel to get article updates directly.
Summary
- 1. Command
- 2. Result
- 3. Command Variations
- 4. Process
1. Command
The most basic command line is this:
$ ffmpeg -i video.mp4 audio.mp3
with assumption the video filename is video.mp4 and the result audio filename is audio.mp3.
2. Result
A conversion of 80MB MP4 video produces a 9MB MP3. With variations (see section 3), we can produce smaller MP3 files by reducing each audio bitrate. Picture below shows several MP3 files, their sizes, and their bitrates respectively, in a folder with the source MP4 video.
3. Command Variations
By default, bitrate of resulting audio is 128kb/s. It's known that same audio with smaller bitrate has smaller file size. You can compress audio file size by reducing the bitrate. However, please note that smaller bitrate represents lower audio quality.
To make it 64kb/s:
$ ffmpeg -i video.mp4 -b:a 64K audio.mp3
To make it 32kb/s:
$ ffmpeg -i video.mp4 -b:a 32K audio.mp3
To make it 16kb/s:
$ ffmpeg -i video.mp4 -b:a 16K audio.mp3
thus, the option to determine a bitrate is -b:a and the notation is [number][K].
4. Process
While converting, the terminal will show text moving informing bit by bit the conversion being processed. Process duration depends on file size and your computer speed. Finished conversion should stop its text movement and it goes back to shell prompt. The result should be available if you see the folder where conversion took place (see section 2).

While playing the result MP3 audio, with VLC for example, you can find out the bitrate by seeing Tools > Media Information > Codec.
Further Reading
- ffmpeg.org - official website
- how-can-i-convert-mp4-video-to-mp3-audio-with-ffmpeg - the inspiration of this tutorial
- itsfoss.com/ffmpeg - a very complete & easy to understand reference in using FFmpeg by Sergiu Itsfoss
- https://opensource.com/article/17/6/ffmpeg-convert-media-file-formats - another good writing about FFmpeg use by Red Hat's publication OpenSource.com
- ffmpeg-the-ultimate-video-and-audio-manipulation-tool - StackExchange Blog has this really nice explanation of FFmpeg for non-GNU/Linux user as well
This article is licensed under CC BY-SA 3.0.


